

 Sometimes you want to draw a pattern, or a border, or a polka-dot texture. But it comes out all wonky and uneven. So this week I practiced even spacing of objects in drawing.
Most importantly, even spacing is absolutely necessary for drawing kawaii faces! The eyes should be the same size and shape, and should be placed on the face on the same level (unless you are placing them unevenly on purpose to get a different expression, hehe).
So in this post I will share with you the tips and tricks I learned for crating even borders and patterns.
This is Week 5 of my drawing challenge to learn how to draw kawaii in 6 months. This week I practiced object spacing – the ability to evenly space out objects by eye.
How To Space Objects Evenly by Eye
Exercise 1
Start with simple exercises. Divide a page into 4 sections, and fill each one with circles, squares or triangles. The reason we divide the page in 4 is to make the space we are working in smaller. It makes it easier to judge distance between the objects.
Aim to make the spacing as even as possible. But don’t worry if it’s all over the place. This skill comes with practice.
I did about 8 pages before I felt significant improvement. Here is one of my practice pages, once I felt confident with spacing:
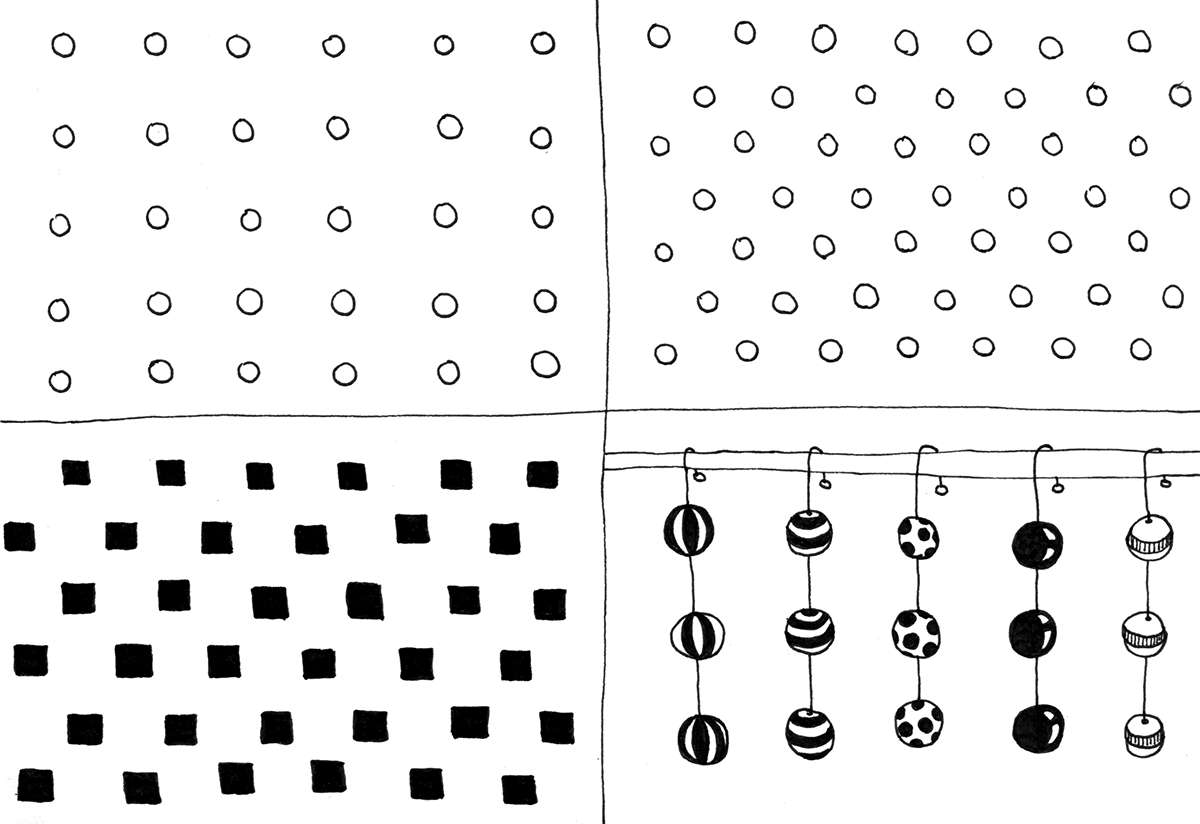
Practice page for even object spacing
Exercise 2
Next, fill the whole page with different shapes. Space them out as evenly as you can. Here is an example:

Fill a page with evenly spaced shapes
Keep practicing with these exercises until you feel comfortable and confident. To make it more fun, you can fill some of the shapes with colours or colour around them.
“Divide and Conquer” Technique for Even Spacing
This is an effective technique to space out shapes, lines, or anything! However, for the purposes of this post I will describe how to use it to space for patterns.

- Draw the first and last shape
- Find a half-point between the shapes, and place another one there
- Find half-points again in the newly created spaces and place a shape there
- Continue this way until desired number of shapes are filled
Even Spacing for Patterns
To draw patterns that look neat and pretty, it is essential to be able to space objects evenly. To practice this skill, I used patterns from [ref book] for inspiration and ideas.
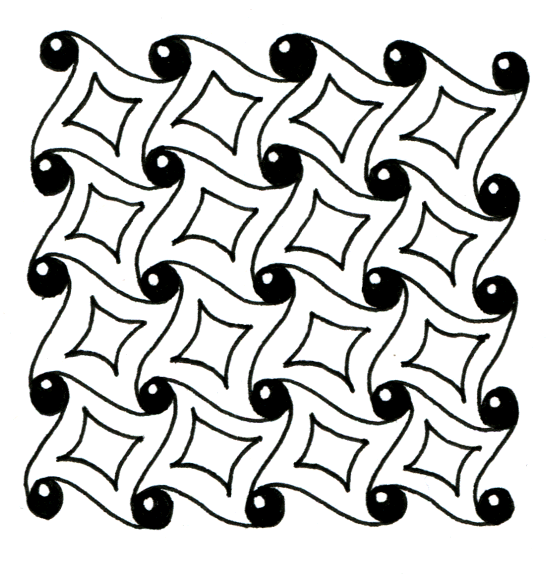
Here is an example of a pattern that is based on a 5 x 5 grid of evenly spaced circles.
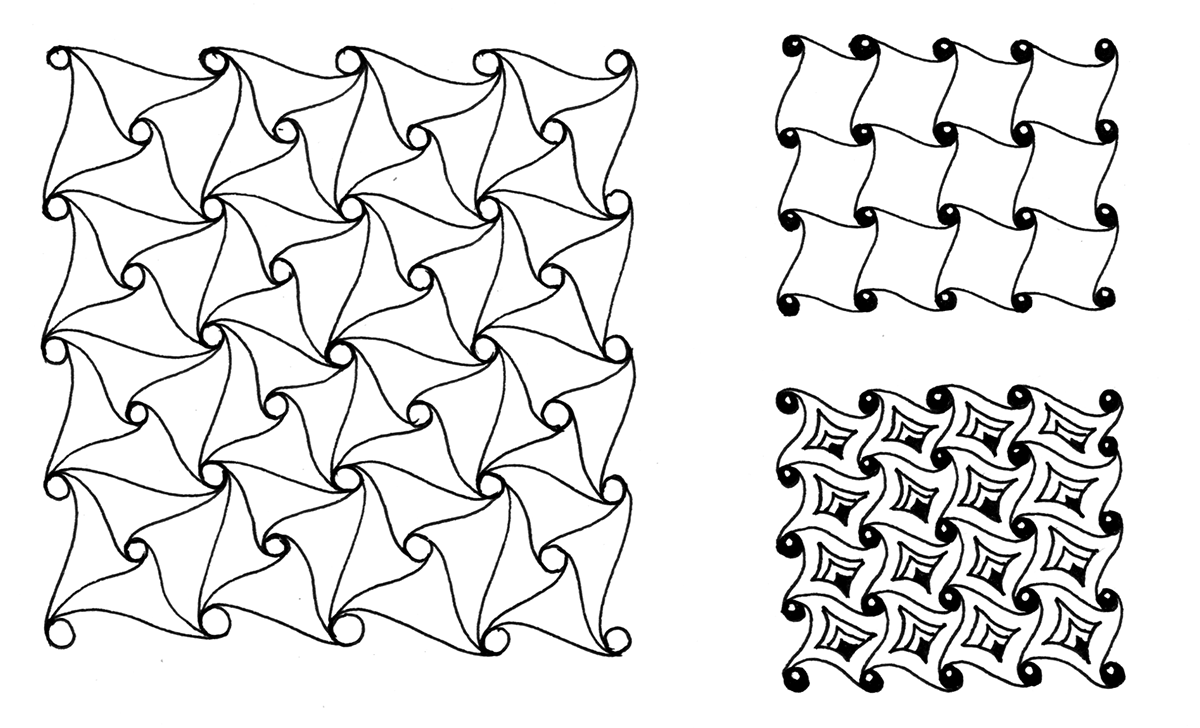
Pattern based on a 5 x 5 grid of evenly spaced circles
I used the “divide and conquer” method (described above) to place the circles and draw the patterns. Let’s look at the process step-by-step.

Step-by-step instructions to draw a pattern around evenly spaced circles
Tips & Tricks for Even Object Spacing
- Use pencil guides in the beginning until you gain confidence and hand-eye coordination
- When not using pencil guides, use a mental line instead. Picture in your mind’s eye where the line would go, if it was drawn. This is very similar to what we do when we write a line on a blank page. We mentally adjust the height of each word in comparison with the previous one. I guess practicing the skill of even spacing will help with lettering too!
- Try drawing the objects in different directions: right-to-left, left-to-right, top-to-bottom and bottom-to-top. I am left-handed, so it’s actually easier for me to go right-to-left. This way I can see the shape I already placed and compare with it.
- Watch out for cumulative error. If you place a shape a little too low, and the next one a little too low, and so on — the small errors will add up to a big one. Remember to pause and look at the “big picture” from time to time to correct overall direction.
- If you are spacing pointy shapes (triangles, stars), it can be difficult to judge the distance between them. Instead of just drawing the shape from the top, look at the farthest edge of the shape that is already drawn, and start at the edge closest to the previous shape. This will enable you to just the same distance consistently.
- If you start to feel overwhelmed and impatient (I did!), just draw a little longer… Press on, and the sense of optimism will return. This advice is for me 🙂
Materials
- Artline pen, size 04, black
- Tombow dual brush pen, black
- Faber-Castell marker, red
References
- The Art of Zentangle book for pattern ideas
- Yoga for Your Brain book for more pattern drawing ideas
- “Kawaii: 1500 Colorful Illustrations” book
Drawing Time Diary
Monday, Dec 12: two sessions, 20 min, 25 min
Tues, Dec 13: two sessions, 40 min, 5 min
Wednesday, Dec 14: three sessions, 45 min, 40 min, 20 min
Thursday, Dec 15: one session, 15 min
Friday, Dec 16: no drawing
Saturday, Dec 17: no drawing
Sunday, Dec 18: no drawing
Total drawing time: 3.5 hours
Did you try any of these exercises? Did they work? Let me know in the comments!
Read all about my 6-month drawing challenge and track my learning progress week by week. Thank you so much for reading!


